So you’re planning your property website, or maybe, you’ve already built it? And now, you want to add radial search to your property search function. That’s a great move. Adding radial search makes it much easier for potential buyers to filter properties by location.
What is radial search?
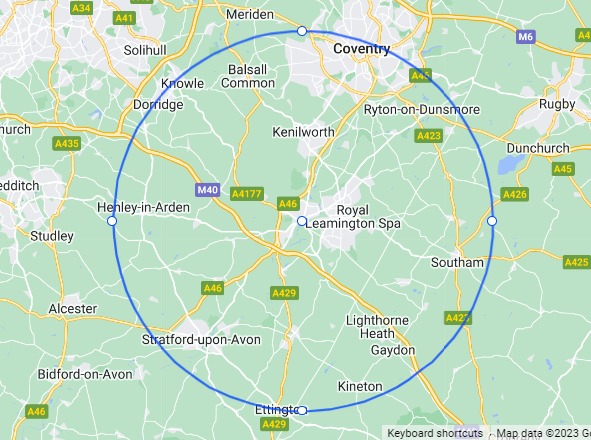
Radial search is an additional search function that is used to filter properties by location radius. For example, the user may wish to search within 5 miles of a postcode, street name or town name.
A search like this performed using radial search will present all properties which fit the location and any other criteria set.

What are the benefits of radial search?
Location precision:
Quite simply, by specifying a central point and looking for properties within a certain radius of that location, your users can increase the precision of their search.
Convenience:
A search by radius will greatly reduce the time and effort required to find suitable options. This convenience and flexibility is a great way to improve the overall usability of your site and increase engagement on your website.
Competitive edge:
Offering radial search functionality can set a property website apart from competitors. It demonstrates a commitment to user friendly features and helps attract a broader audience of property seekers.
Data insights:
Estate Agents can gather valuable data on user preferences and property trends in specific areas through radial search usage. This data can be used to refine their offerings and marketing strategies.
How do I add radial search to my property website?
1: Purchase the add on
Until October 9th 2023 this add on can be purchased from Property Hive with a lifetime license for £34.99. After that it will be included within our Pro Bundle Package alongside our other amazing add ons!
2: Install and activate the add on in WordPress
If you’re reading this prior to the 9th October 2023, then this step is relevant for you. If you have purchased an annual subscription on or after the 9th October 2023, the add on will simply be available to toggle on/off on the Pro dashboard.
To activate the plugin, follow these steps: ‘Plugins > Add new > Upload’ and upload the zip you received when you purchased the add on.
3: Add radial search to your search form
We recommend using our Template Assistant add on to help with this step. It’s free and gives you the ability to control the fields shown in search forms through the WordPress interface using a drag-and-drop form builder.
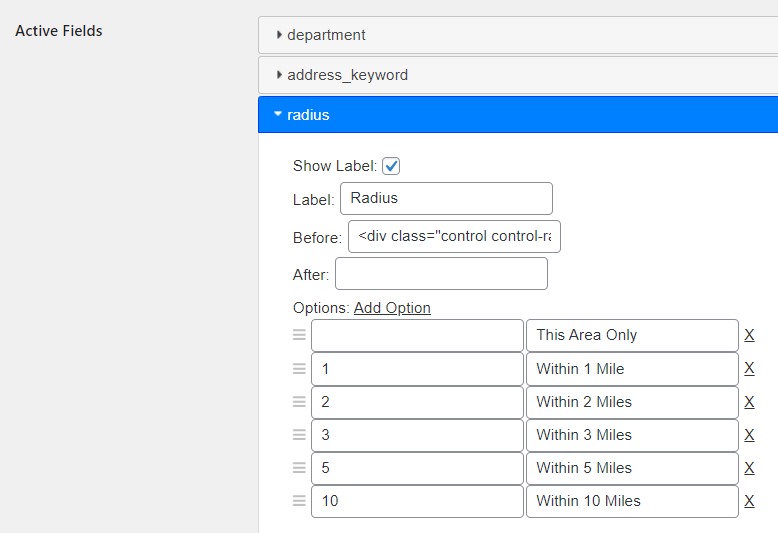
Once you’ve activated Template Assistant, navigate to ‘Property Hive > Settings > Template Assistant > Search Forms‘ and edit the search form that you want to add radial search to. You will notice that there is a ‘Radius‘ option in the list of ‘Inactive Fields‘ which you can then drag into the ‘Active Fields‘ list.

4. Setup geocoding
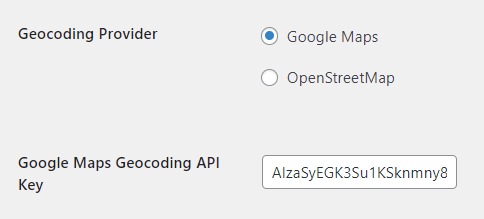
When someone searches for a location, we need to convert this to a set of coordinates. To do this we use a third party service which can be configured under ‘Property Hive > Settings > General > Map’.
You have the option of 2 geocoding providers; Google and OpenStreetMap. Please note that if you are using Google, you will require an API key.

To find out more about obtaining this API key, here’s our relevant documentation on this topic.


