Table of Contents
Already using Street CRM? Property Hive connects it to your WordPress website, automatically importing your property listings and keeping your site up to date. Simply manage your properties in Street as you normally would, while your website reflects the latest changes in the background.
How does Street CRM integrate with WordPress?
Property Hive connects your Street CRM to your WordPress website using Street’s API. Once connected, your property listings are imported automatically, so you only ever need to manage them in Street.
Add a new property, update a price or mark a listing as sold in Street, and Property Hive takes care of updating your website in the background.
What gets imported from Street CRM?
When you publish a property on your website, you want it to look exactly as it does in Street. Property Hive automatically imports everything from property details and prices to images and features, so you only ever need to manage your listings in Street.
That means you can continue managing your listings in Street, knowing that your website will always reflect the latest changes.
How do I connect Street CRM to WordPress?
1. Install Property Hive and Property Hive Import
Before you begin, you’ll need a WordPress website running the free version of Property Hive, along with the Property Import add on.
Property Hive is free to get started with, while the Property Import add on includes a free 7-day trial. Once installed, you’ll be able to connect to a range of estate agency CRMs, including Street, and start importing your property listings automatically.
If you haven’t already, install Property Hive and start your free trial of the Property Import add on before continuing with the steps below.
Download Property Hive for free
Start your free 7 day import trial
2. Obtain your API Key from Street
You will need to generate an API key to enter into WordPress. To do this, you’ll need to log into your Street customer area.
Once logged into Street, navigate to Settings (left hand menu) > Applications (left hand menu at the bottom of the page) > ‘Create new application form’
Complete the application form, ensuring you select ‘Property Feed API’ for the API Token Scope.
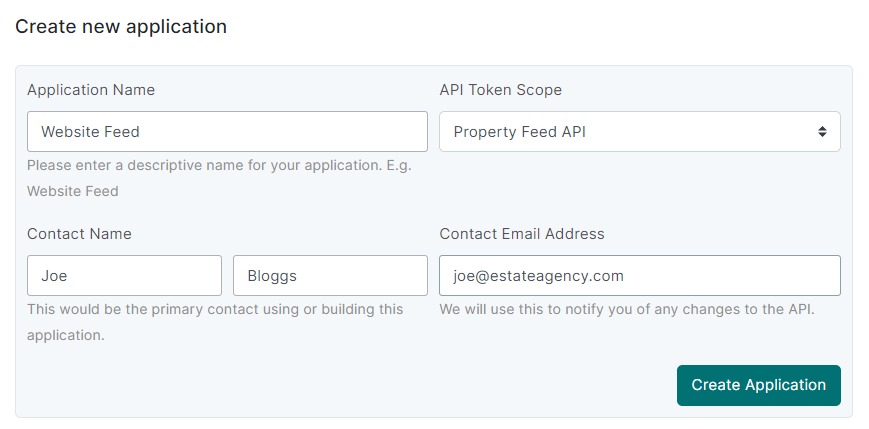
Street application form to generate API key.
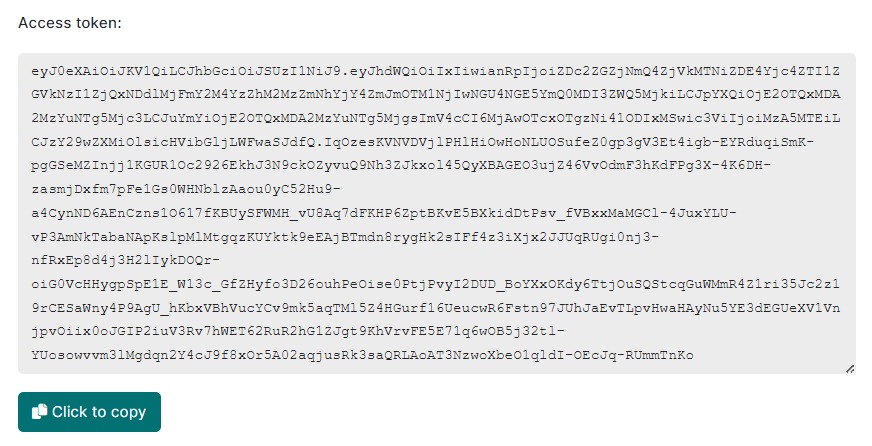
This will generate an API key which can be used in the next step:
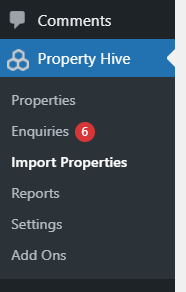
3. Begin the set up wizard
Once you’ve got the Property Hive import add on and your API key to hand, you can navigate to ‘Property Hive > Import Properties‘ from the left menu in WordPress and begin the setup wizard.
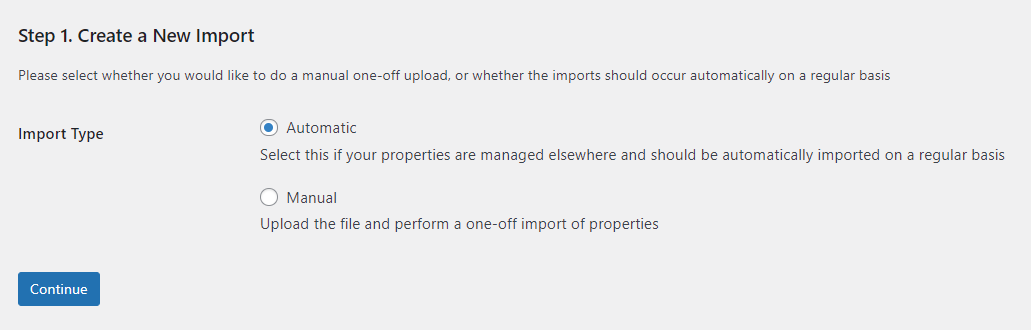
4. Initiate your new import
To setup your new import, select ‘automatic’ and click ‘Continue’.
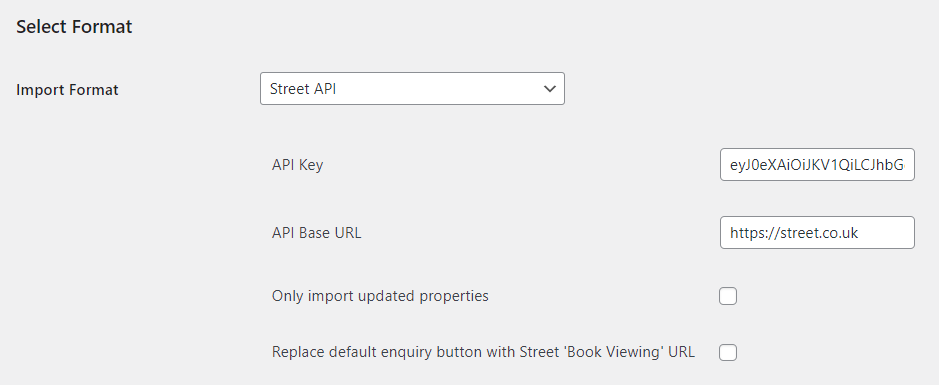
5. Select the ‘Street’ format and enter API Key
Find the Street format in the drop down menu, titled ‘Street API’’ and enter your API Key (see step 2).
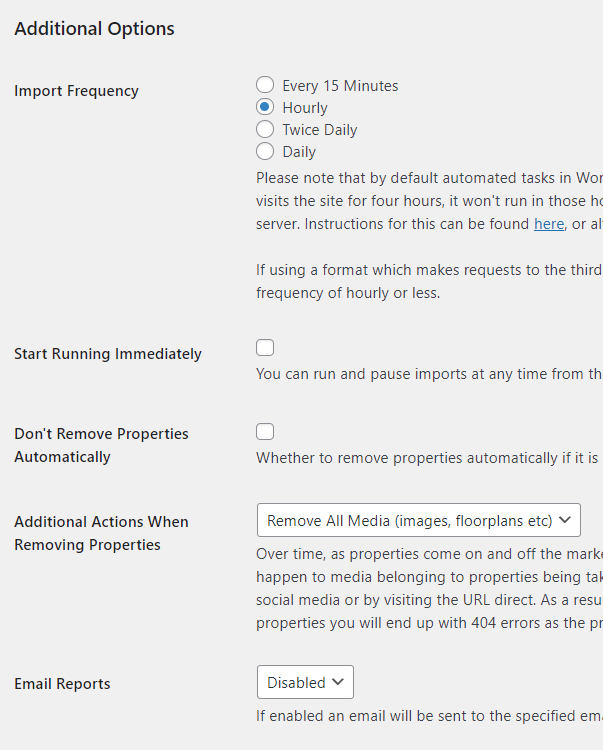
6. Select your import frequency
Under additional options you can specify a whole host of advanced options relating to how the imports run, including selecting how regularly you want them to run. This could be every 15 minutes, hourly, twice daily or daily.
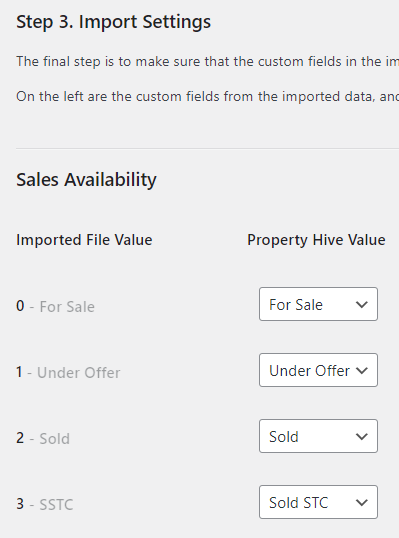
7. Map Custom Fields
The final step is to map custom fields such as availabilities, property types and more. This step allows you to map any values in Street to the values you have setup in Property Hive.
What happens after setup?
Once this final step is completed your import will run automatically going forward. Any changes to properties made in Street should be reflected in Property Hive as soon as the next import runs.
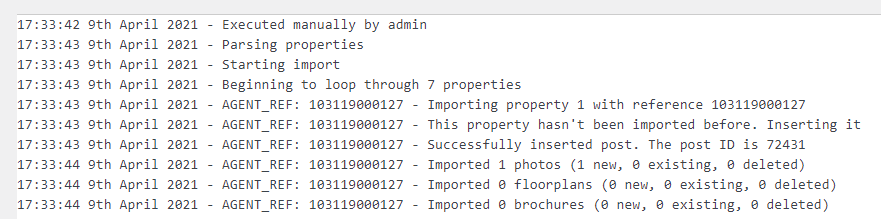
Another great feature of this add on is the logs which allow you to see exactly what happened every time an import ran. This includes the date and time, how many properties were imported, how many items of media were imported per property and identifies any errors that occurred as it ran.
Consider a license key
To get the most out of the Property Import add on, you can purchase our annual license key which gives you access to all the latest updates and priority support.
For additional information on setting up an import from Street to WordPress or to debug issues with existing imports you can take a look at our documentation page.