We’re pleased to announce the release of our brand new Zapier add on which allows you to boost productivity and automate tasks you might be doing manually, or indeed currently putting off.
What is Zapier?
Zapier is an online automation platform that allows you to connect various third party software platforms, with no programming knowledge required, or the need the hire someone to build an integration for you.
Let’s look at some real-world examples where this might benefit your estate agency when using our WordPress plugin.
Examples of Zapier in action

When a new property is put on the market in Property Hive you can have it post out to Facebook and other social media sites.

When a contact is added into Property Hive or registers via your website you can have them automatically send to MailChimp for future marketing campaingns or autoresponders.

If your team uses Slack it can be useful for messages to be pushed into Slack as things happen within Property Hive to ensure other staff members are always kept up-to-date.
Triggers available within Property Hive
The following triggers (i.e. when this happens in Property Hive, then something else should happen in another app) are currently available within this first version of our Zapier add on:
Property Created/Updated
Property Put On Market
Property Deleted
Contact Created/Updated
Contact Deleted
In following versions of this add on we’ll be massively extending this list of triggers to cover all scenarios. If there’s a particular trigger you’d like to see added do get in touch.
Getting started
Step One: Sign Up To Zapier
You’ll need a Zapier account. You do get a free trial period to test this functionality, however going forward you will need at least the Starter package in order to use the available Webhooks.
Step Two: Create Your First Zap
Navigate to your Zaps and click ‘Create Zap’.
Step Three: Select Webhook
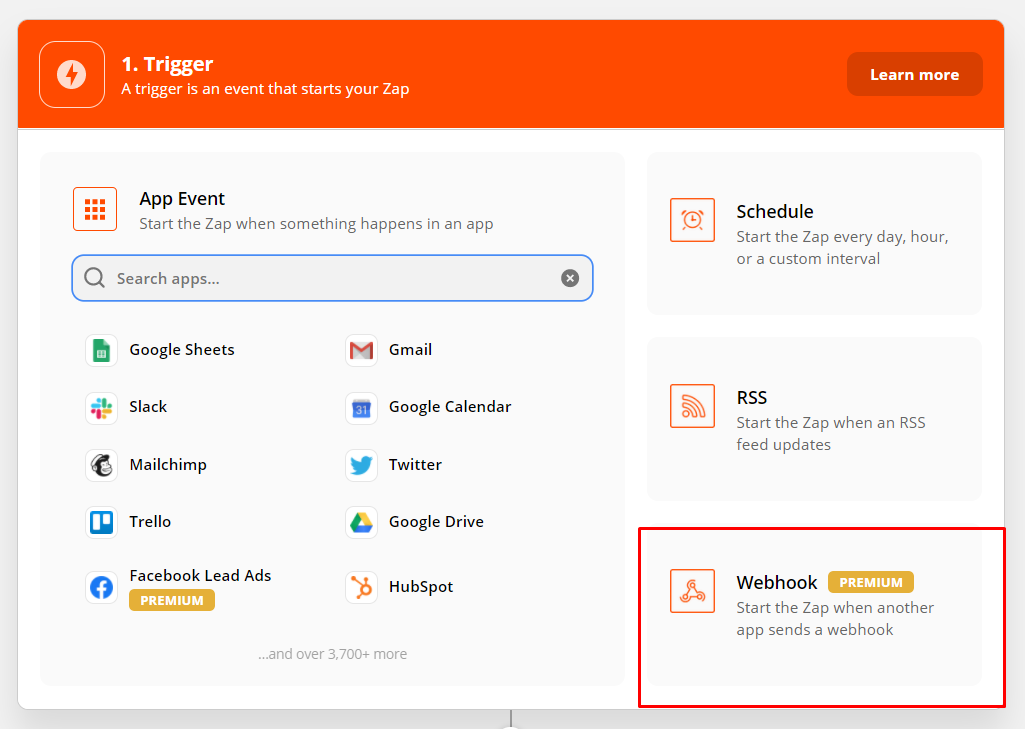
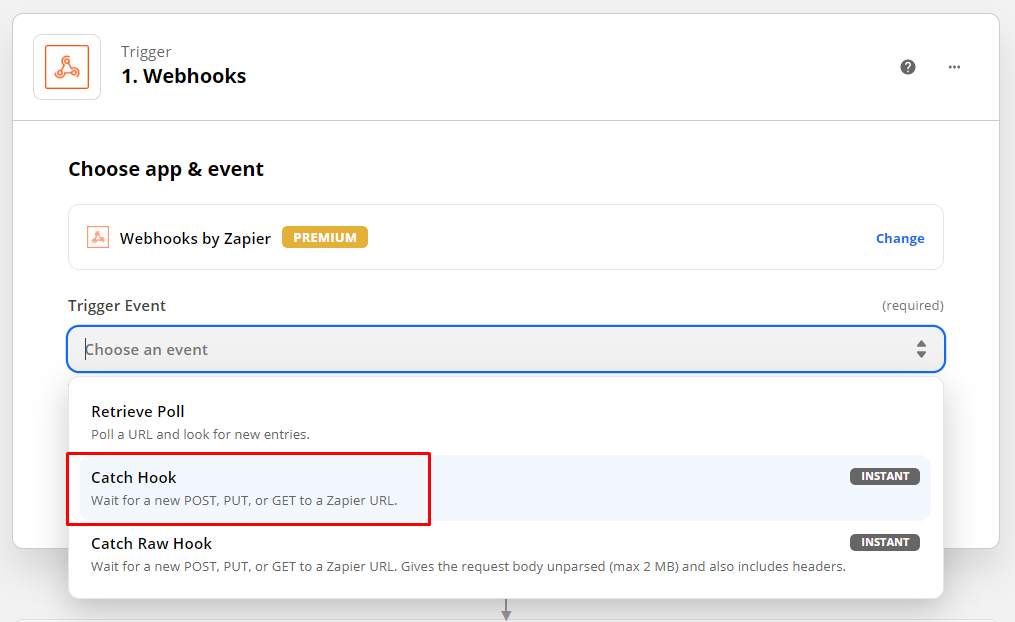
Step Four: Choose Webhook Trigger Event
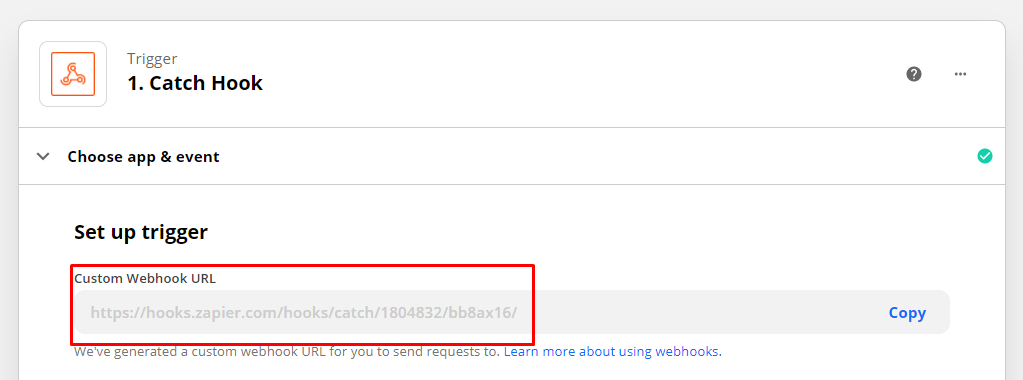
Step Five: Copy Webhook URL
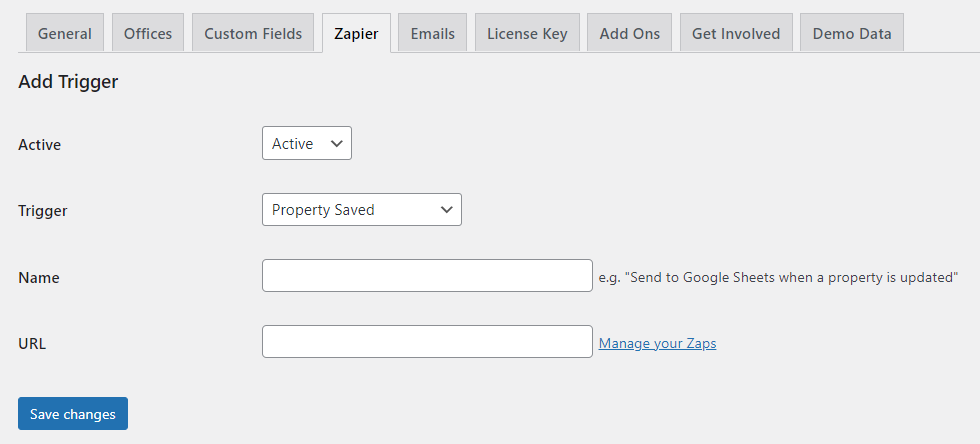
Step Six: Create Trigger In Property Hive
Within WordPress navigate to ‘Property Hive > Settings > Zapier‘ and create a new trigger, entering the URL from the step above.
From here on the steps differ based on which third party application you’re looking to integrate with and the action being used, but continue through the wizard in Zapier and you’ll have your first zap setup in no time.
To assist with debugging, from within the settings area of the Zapier add on in WordPress you’ll also have access to extensive logs where you can see every request and response.
We’re excited at the possibilities this now offers to estate agents and can’t wait to see some of the Zaps created and to expand the number of triggers available.


